Posts

“Archery Fit” Archery Tips | The Importance of a Square Nock End

 The Importance of a Square Nock End

While today’s arrow shafts are extremely consistent compared to those manufactured just a few short years ago they are still a manufactured product and like any product subject to manufacturing tolerances. One of the advantages of fletching your own arrows is the fact that you have more control over the quality of the finished product and that starts with the simple step of making sure that both ends of the arrow are square and true to the center.

How Arrows Are Made

Aluminum arrows are normally produced though what is known as a “drawing process”. During this process, aluminum tubes are heated and “drawn” or pulled to obtain the desired outside and inside diameter which results in an arrow suited for a specific draw length and bow weight.

Carbon arrows, on the other hand, are commonly made by “wrapping” a carbon cloth to form the arrow. In either case, each method is designed to produce a product that is as uniform as possible throughout its length. However, simply due to the manufacturing process, the arrow is most consistent throughout the middle of its length than either end. That means that when cutting a 28 inch arrow out of a 32 inch bare shaft it makes the most sense to take it out of the middle and cut two inches off of each end of the arrow as opposed to four inches off of one end only. This cuts the finished arrow out of the most uniform and therefore most consistent portion of the bare shaft.

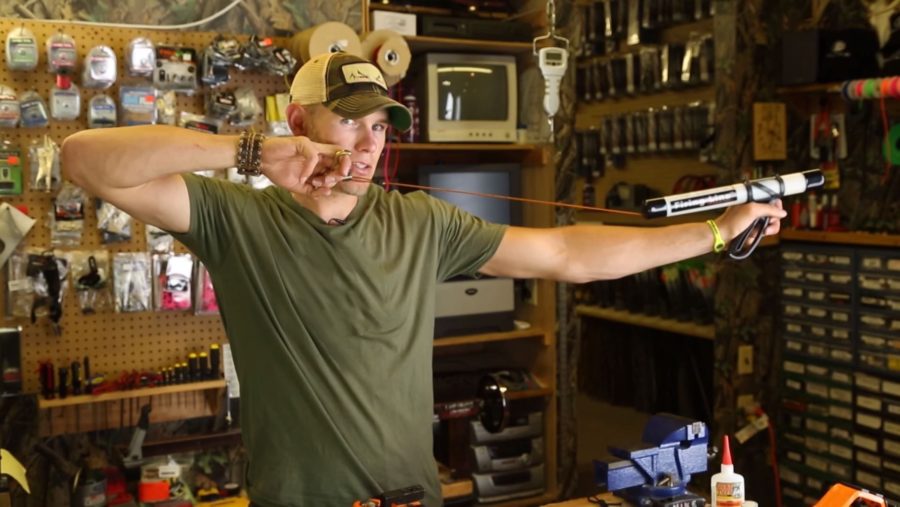
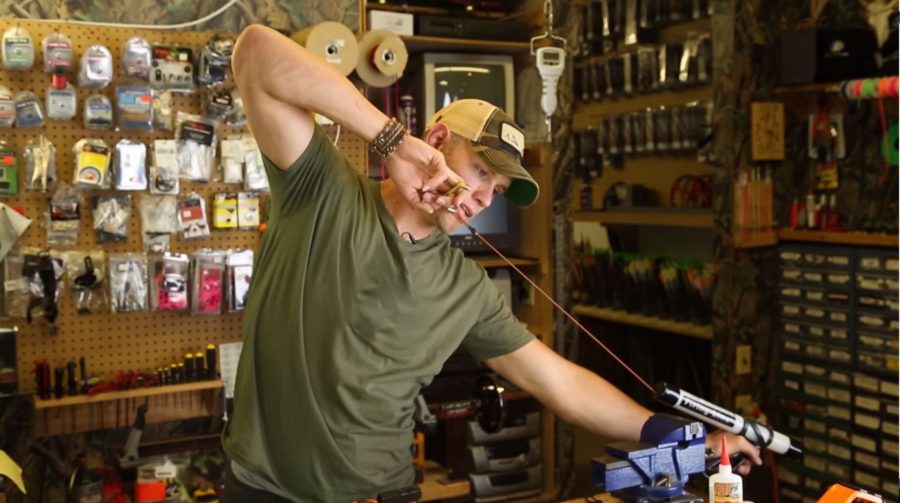
Cutting & Squaring Your Own Arrows

For those of you that have your own cut-off tools, this is a simple matter. However, if you have your shafts cut at a pro shop you will have to make your desires clear to the shop technician. It is common practice for most pro shops to simply trim the one end, if they do so at all, and take the excess shaft from the other end in one cut. There may be a slight charge for the extra cut but it is well worth the cost.

However, when the arrow is cut to length the job is not done, it is just starting. The next and most important step is the squaring of the arrow ends. A high quality cut-off saw will do a good job when cutting the arrow but the blades on a cut-off saw are thin and flexible and depending upon the amount of wear on the blade the cut can be a little “wavy”. Also depending upon the experience of the operator it is possible for the cut to be at a slight angle, not visible to the eye, if the shaft is not held tightly against the cut-off saw guides. Regardless of the reason it is important to square both ends of the shaft to ensure the quality of the finished product after the shaft has been cut to length.

All manufactured items are built to within a tolerance range of plus or minus. When you put together several items those tolerances add up so to maintain accuracy it is important to eliminate or minimize any potential tolerance build-up whenever possible. When inserting a target point or hunting insert into a shaft there are several tolerances to consider, first is the difference between the inside diameter of the arrow and the outside diameter of the insert plus the squareness of the insert shoulder and the squareness of the shaft end. For best possible overall alignment the better the shoulder of the insert and the end of the shaft fit together the closer the insert will be centered with the inside of the arrow and any point, field tip or broadhead will, therefore, be more closely in line with the center of the arrow. This difference may not be as noticeable with a field tip or target point but when mounting a broadhead which again has its own set of manufacturing tolerances the difference can be quite dramatic.

All of the same truths can also be applied to the nock end of the arrow. If the nock end is out of square it will not allow the nock to properly seat in the arrow when inserted. This condition, in turn, can force the nock to make contact to the side of the actual center of the arrow shaft. This difference may not be noticeable to the naked eye but it is definitely noticeable to the dynamic forces to which the bow and arrow are subjected when the string is released.

The instant the bow string is released the power stored in the bow limbs is transferred to the arrow through its contact with the string. That power transfer is transmitted through the nock and into the arrow shaft itself causing the forward motion of the shaft. It is important that this power transfer is done as smoothly as possible and also as centered as possible. The ideal and most efficient situation is to have the force concentrated on the center of the arrow shaft. If the force is applied off center it creates unequal pressure on the arrow during the shot and with each arrow being different if the ends are not squared this condition gives more variation shot to shot resulting in inconsistencies.

For an example suppose your truck was sitting on a piece of slick ice and was out of gas and you had three buddies who were going to help push you down the road. The ideal situation would be to have one at each corner of the truck and one pushing in the middle which would equally apply their force across the back of the truck. This would equally apply the force to the truck which would also be centered moving forward. Let’s suppose on the other hand that all three pushed from one corner of the truck. Their total applied force when applied off center would have a tendency to move the truck at an angle to the side. Their applied force would not be properly directed resulting in a waste of effort and lack of control or induced error. This same logic applies to the square end of an arrow. Making sure the nock end is square enables the nock to fit properly with the shaft and ensures the power transfer from the string is as close as straight down the middle as possible.

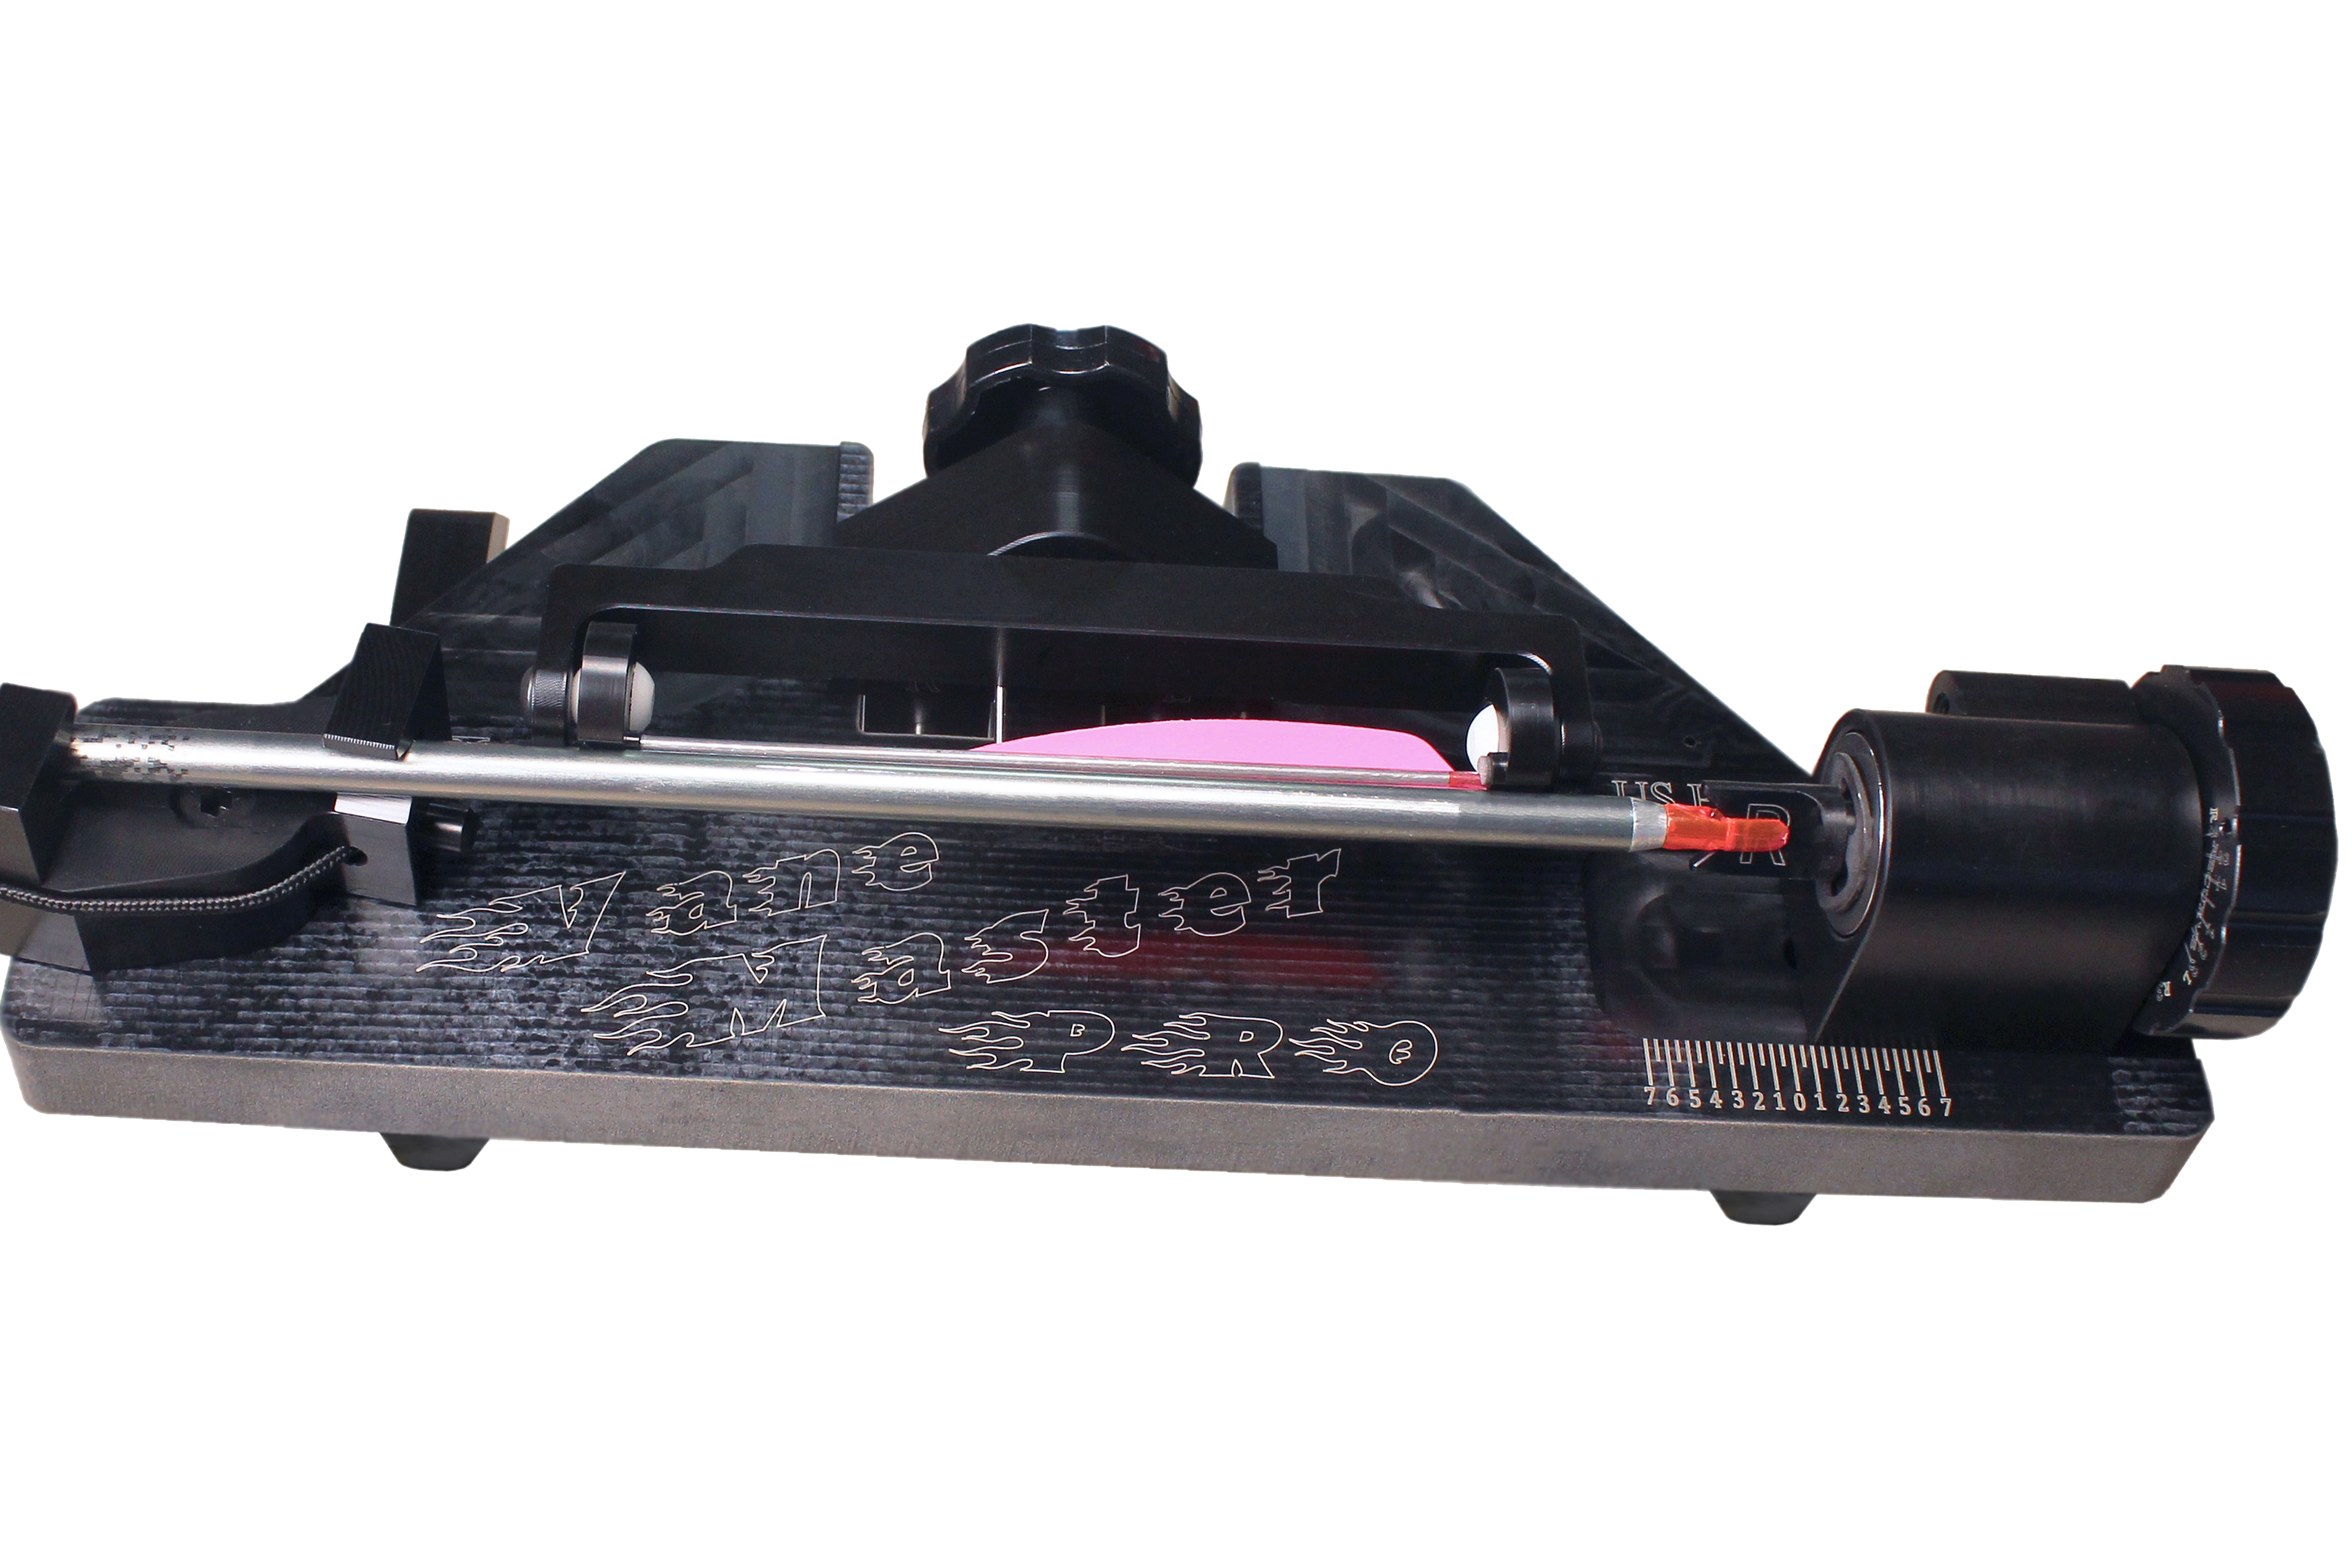
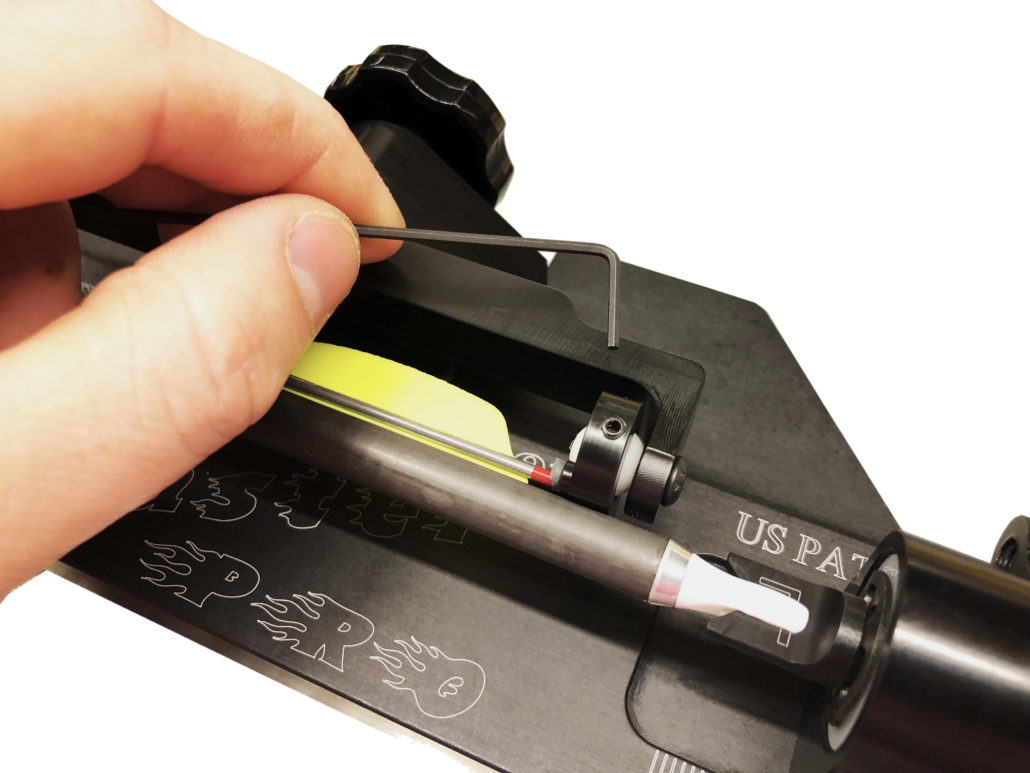
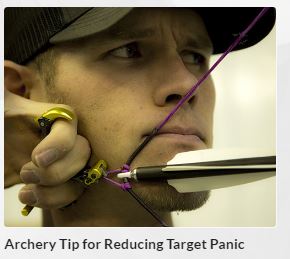
PHOTO: Squaring the ends of an arrow is the first step when it comes to ensuring perfect nock alignment to ensure proper transfer of power from the string to the arrow. Squaring the end of the arrow also provides better point alignment and broadhead flight. A squaring tool allows the squaring of both ends of bare shafts before fletching as well as the nock end of arrows already fletched.

Simply sanding the end of the shaft may make it smooth but it does not guarantee that it’s square. Squaring the shaft ends is simple, takes only seconds to do and is well worth the time and effort.). A Squaring tool is designed to square arrow ends to ensure the proper fit for activating  Nockturnal Lighted Nocks it is also ideal for squaring both ends of the arrow for the reasons described above. A squaring tool is a simple v-rest tool with a sand paper disk at one end against which the arrow end rest. A few simple turns of the arrow against the disk and any irregularities or high spots are quickly removed leaving a smooth flat square surface perpendicular to the center of the arrow. If you cut-off your own arrows having one of these tools makes the job complete. Ask your pro shop if they have one available for squaring your shafts if you have shafts cut there. If they do not provide that service consider making the investment yourself if you intend to build your own arrows.

Conclusion

Some shooters might ask, “Is all this really necessary, after all, does a little bit really matter?”. If you ever lost a tournament because one of your arrows is “just out a little bit” you would not ask that question. Every serious archer, be they a tournament shooter or a bow hunter should strive to be the best they can be. Success in both fields is often determined by fractions of an inch. With equipment and shooters today being highly focused on every aspect of their game there is little room at the top and often the second place is quite crowded. To be your best and stand above the crowd it is necessary to ensure your equipment is performing at its best and the place to start is with the squaring of your arrow ends.

“Archery Fit” Archery Tips | Fletching Arrows

Fletching Arrows | Fletching Jigs, Helical, and Offset Vanes

A direct comparisons can be made between a hand loaded rifle shell and an arrow when it comes to accuracy and group size. We all know rifle shooters who obsess over the combination of bullet weight, shape, design, amount of powerprimers, built-up pressures, trajectories, and various combinations of all when seeking the ultimate load for a particular rifleAn archer seeking the best arrow for a particular bow or a specific purpose follows much the same path and the ability to fletch and refletch arrows as required is an important part of the process. A growing number of archers understand the advantage of fletching their own arrows. While buying finished arrows is quick and convenient it does not allow for custom tuning and is like buying “factory ammo” off the shelf. It works but does it provide the greatest accuracy and smallest groups?

Anatomy of a Hunting Arrow

An arrow is made up of several basic components. The arrow shaft, point weight and design, nock and fletching. When selecting an arrow shaft there are several considerations, shaft weight, straightness, stiffness or spine and the tolerance to which each shaft is held. Obviously the tighter the tolerance the closer matched the arrows will be in a given set. When it comes to arrow spine some shafts have indication marks which if aligned when fletched will position the stiffest portion of the arrow in same direction to increase the consistency of each shot.

Point weight is dependent upon the end use. Heavier points are often preferred by hunters seeking large game to increase penetration. Heavy points are also used by target shooters when shooing long distances in windy conditions to minimize wind drift. Lighter points are favorites of archers desiring to achieve maximum arrow speed and flatten trajectory. Changing point weight also impacts the spine, (stiffness), of an arrow and can be used to make minor changes when tuning a bow. The addition or removal of weight to the point can stiffen or weaken an arrow shaft and also impact the arrows FOC, (Front of Center balance point). The addition of weight weakens the spine and the removal of weight makes the arrow tune stiffer.

Nocks which are the smallest but important component are selected on arrow type and string fit. A nock must be just snug enough to remain on the string during the draw but leave the string with minimum interference upon release. Most quality nocks have a slight, “snap-on, feature which satisfies both requirements nicely. For most hunting arrows, most hunters also seek lighted nocks that cover these requirements.

Fletching

When it comes to fletching there are numerous styles on the market from which to choose. At one time natural turkey feathers were the accepted fletch and while they had the advantage of forgiveness when crossing the rest they were inconsistent in weight and thickness and did not perform well in wet weather. Feathers are still popular today especially among traditional shooter and in some cases indoor shooters looking for ultimate forgiveness or shooters desiring a large stabilizing fletch. Feathers were an important part of archery’s history and will always remain so but today’s plastic vanes control the largest market share. In addition to being weather resistant and much more durable then feathers, vanes are also consistent in shape, thickness and weight. These characteristic have greatly increased the ability of the archer to produce more closely matched arrows and tighter groups.

Vanes are available in a variety of shapes and lengths which offers the archer numerous options when selecting the vanes that will produce the tightest groups. In addition and equally if not more important is the angle at which the vane or fletch is applied to the arrow shaft. That angle can be varied from right to left with anything in between a slight offset to a hard helical. Fletch angle is directly associated with arrow spin and stabilization. The harder the angle and more helix applied the greater the generated spin which increases stability to a degree but which can also reduce speed impacting trajectory at long ranges. Fletch angle is a series of trade-offs and experimentation is required to determine what works best for what purpose.

All of these options are available to the archer that chooses to fletch their own arrows and it offers not only convenience but the ability to experiment with the combination of arrow components that produces the best results for the intended purpose.

An arrow set-up for indoor shooting is often different than an arrow set up for 3D or one set-up for long range target shooting. The same is true with hunting needs. A broadhead tipped arrow that is perfect for hunting whitetail at under 35 yards is different than the best arrow set-up for elk or caribou where a 65 yards shot is common. Could one arrow work for the various aforementioned examples? The answer is definitely yes, but that does not mean that one arrow is the best for all situations. The easiest way to find the best arrow for your specific set-up is fletch your own arrows which gives you the ability to experiment with different components to find the best arrow for your intended purpose. Fletching your own arrows gives the archer the same ability as the hand-loading rife shooter to find the best load for a particular rifle and purpose.

Whether you are interested in fletching your own arrows for convenience or in order to fine tune your set up it is basically simple and requires only a few tools the main one of which is a fletching jib. Fletching jigs come in various price ranges and designs. Some jigs fletch one fletch at a time while others can do three fletch at once. Actually the number of fletches applied should be the least consideration. When selecting a fletching jig it is important to select one that is easy to use and is accurate allowing the user to install each fletch in exactly the desired position and to repeat that for each vane including one that might have to be replaced in the future. This eliminates the need to strip all the vanes from any arrow requiring repair.

PHOTO: The Vane Master Pro, (VMP), fletching jig from Last Chance Archery is simple, flexible and easy to use. It is also extremely precise allowing for the accurate placement of vanes in any desired configuration.

One of the most accurate and versatile fletching jigs on the market today is the Vane Master Pro, (VMP), fletching jig from Last Chance Archery. The all-new Vane Master Pro is an innovative tool made to provide perfection and consistency when fletching arrow to arrow. The VMP is designed to accommodate every arrow size with little or no adjustment. Arrows can be fletched at 0-5 degree helical, left or right, with the ability to hold vanes up to 4 inches in length. This jig has the ability to fletch 3 or 4 fletch configurations (4 fletch knob sold separately) while using Vane Flat Technology. Vane Flat Technology uses two wires to hold the vane, allowing  the clamp to perfectly contour around the shaft, for perfect vane adhesion every time. Aoptional  crossbow adaptor has recently been added to the line-up which allows the VMP to be used to fletch crossbow arrows regardless of the style nock used.  Last Chance Archery has upgraded its three fletch, or 120 degree knob for its VMP fletching jig. Not only can you now fletch 120 degrees spaced vanes while aligning your nock with your cock vane up, but you can also fletch 120 degrees and have your cock vane align at 90 degrees for recurve shooting or for those utilizing a rest requiring this nock positioning. This knob is standard on all new VMP jigs and is also available as a retro fit for older models. 

PHOTO: The VMP utilizes flexible wires to hold the vanes in the proper position during the fletching process. These flexible wires allow the vane to easily contour to the shaft surface regardless of shaft diameter and desired angle of vane ensuring accurate placement and maximum adhesion between the vane and shaft..

A precision tool like the VMP allows the archer to easily try different shapes and angles of vanes to determine which combinations produce the tightest groups as well as perform accurate vane replacement when required.

The choice in vanes is almost staggering with new ones being introduced continuously. While in some ways today’s vanes appear similar to the ones introduced years ago, the changes have been dramatic. Today’s vanes offer new technical shapes specifically designed to provide sufficient guidance and quick arrow correction with minimum drag. The material itself has greatly improved and now posses better memory avoiding vane distortion from pass-troughs. Today’s colors are widely varied and highly visible allowing for individual creativity for those with a flair for fashion. Recon Archery Products will be introducing a line of vanes shortly which will incorporate these features in a new highly efficient performance vane.

For those new to fletching the best advice is to pay attention to the fletching directions included with their shafts or vanes. Make sure shafts and vanes are clean before fletching, closely follow cleaning directions and use the recommended adhesive for trouble-free results.

Photo: Levi Morgan shoots arrows with fletching that has a 2 degree offset as he shoots long distance most of the time. Unless you are shooting a light arrow it is hard to put a lot of helical or offset to arrows as once the arrow gets passed 50- 60 yards it begins to over control the arrow. This is called the arrow parachute effect, essentially the back of the arrow slows creating an arrow that has decreased accuracy.

Fletching arrows yourself allows you to control the end quality of your arrow as well as try different combinations of vanes, shafts, points and nocks to develop the best finished arrow for your intended purpose, tightening your groups, putting more points on your score card and bigger trophies on your wall. It is definitely worth the extra effort.


How Competition Archery has Made Me a Better Bow Hunter

Transitioning from Competitive Archery into Bow Hunting

Being competition shooter has no doubt made me a better hunter. Every week I compete, I’m faced with the same pressure I experience during that decisive moment of a hunt. The stress of shooting at a deer’s vitals is the same I experience trying to keep myself together when shooting that final arrow in competition. The level of preparation and mental toughness I’ve learned from being a professional archer has allowed me to excel under pressure when in the stand bow hunting.


Finding Gear 

Many people get caught up in gear brand and types, when they need to focus on fit. Finding the right gear, the basic process for competition shooting and bow hunting are the same: decide on the gear that fits you well.

Gear brand isn’t as critical as gear comfort. In today’s industry, most top end bow manufacturers make quality products. The key to shooting these quality products well is searching for brands that feel comfortable to you. When you shop, try every bow you can.  Put it in your hand, shoot it, and concentrate on how it feels.  It has to feel right to shoot right. 

Once you have equipment that feels right to you, you can balance and tune it with precision (paper tuning for example). A properly tuned bow creates a more forgiving shot in the field and the stand.  I have an entire video playlist on how to properly tune your bow and some top notch archery tips.

Proper Archery Form 

Target shooting has defined how I shoot. Whether you’re shooting at a deer, or shooting at a target, it’s important for you to be straight.  This means you should be in a straight line, feet shoulder width apart, with no leaning or tilting.  Your arm should be “straight relaxed”. However, despite understanding these basics of shooting a bow, I don’t want you to get caught up in the details. Why? Because I’ve been by guys that have a form that you would never find in an archery book. Whether you’re bow hunting or competing, there is no such thing as “perfect archery form” despite what many people have you believe.  In fact, there isn’t a right or a wrong form. Success simply depends on how repeatable your form is. 

Some of the best shooters in the industry don’t shoot by the “book”.  They simply have a process that they can follow time and time again. They know this process produces results, and it allows them to focus on simply aiming, rather than hitting their target.  

The same theory applies to bow hunting. If your form is repeatable, your shot will be repeatable when you need it the most. When you pull back on a deer, you shouldn’t be thinking about proper form, you should be thinking about aiming and the end result. This is crucial when developing your shooting process.

Develop a Process 

Developing a process is critical in competitive archery. Developing this type of process can improve anyone’s success when bow hunting. If all you’re thinking about is not messing up the shot, then you’re likely going to mess up the shot. That’s why you need to think about a single step of the process, and rely on your instincts to follow through with the rest.  

So how do you develop a repeatable process?  By breaking your goals into small steps.  You need to be able to think about each of these steps rather than focusing on the big situation (like not missing that deer). The right process is one where you think about aiming, and everything else just happens.


My shot process looks like this: 

  • When a deer is coming in, I only focus on ranging him.  By focusing on how far he is, my mind isn’t focused on the situation. This keeps the pressure under control. 
  • When I come to full draw all I focus on then is aiming. I literally tell myself time and time again to “just aim”.  You should never be focusing on firing that release.  The release should be a subconscious movement, your consciousness should be focused on aiming that pin.  

Below are a few drills I recommend to develop this shooting process: 

  • Aiming Without Firing an Arrow 

Hold it for as long as you can until your form starts to break down.  You learn to ease your mind and the anxiety when firing your shot.  You are also building your stamina. 

  • Blind Bailing 

This is where you walk up within 2 or 3 yards of a target and close your eyes.  Picture your pin being in the middle and practice firing over and over again. Learn what that surprise release feels like. Doing this will create a much more fluent shot.  

  • Long Range Shooting 

Shooting from a distance magnifies everything. That’s why long range shooting is my go to drill for competition and archery. If I need to shoot from 40 yards, then I’ll practice at 80.  Doing this magnifies any issues I might be having with my bow or my form.  This also makes shooting closer seem so much easier.

Handling Pressure 

Where target experience shines is when a person has to deal with pressure as a hunter.  There are many similarities between archery competitions and hunting situations, and pressure is a big one. With bow hunting, you’re faced with the pressure of “one shot”.  You have only one chance to execute this hunt.  With one mistake you could miss the deer and the opportunity will be over.  As a hunter, you may only experience this feeling a few times a year, so it can get the best of you.  

However, with competition archery you experience this feeling every week. You learn to excel when put in high stress situations week in and week out.  This constant pressure builds mental toughness. This is a toughness you can take to the stand. 

By practicing the tips above: finding a comfortable bow, properly tuning, developing a process, and practicing, you can overcome any target or buck pressure.  Remember to break your goal down into actionable steps that will allow you to focus on aiming, and not panicking, during the shot.  

Putting it Together  

Many hunters practice a few days before season, at twenty yards, and call it good.  However, that won’t result in a successful (or ethical) journey as a hunter.  It’s your responsibility to make the shot at your highest potential.  

Much of my success as a hunter comes from the time I put in as a tournament shooter.  As a hunter, it’s your job to put in time, every day, to assure you are successful as well.  I can’t emphasize enough the importance of learning how to develop a process and focusing on the individual tasks of that process. To do this, you need to create subconscious actions you can only achieve through practicing. Remember to reach your full potential, learn how to keep your mind on aiming at full draw and letting the process handle the rest. Then you’ll find success too.

The Archery Tip No One Knows | Tuning Arrows Before Fletching

The Archery Tip No One Knows

This is an archery tip that not many people know about. Sure everyone knows about why you should tune your arrows, and how to fletch an arrow, but rarely have I heard about tuning arrows before fletching is applied. This tip should help you become a better archer and bow hunter.

I start by bare shaft tuning my bow, then the next thing I do before I fletch my arrows is take that arrow and shoot it into the target. The idea here is that I can see the natural launch of the arrow out of the bow. If the arrow launches out of the bow left, then I will fletch it with a left helical. If the bow launches the arrow right, then I will fletch the arrow with a right helical. This fletches with the natural launch of the arrow, creating a lot more forgiving bow setup.

If you don’t do this, and fletch on the wrong side of the arrow, you will tend to get a knuckleball effect. Say you have an arrow with a natural left launch, but fletch it with a right helical. The arrow will immediately launch left, but will have to correct itself in flight to the right. In that process the arrow could have a lot more movement, throwing off its flight and destination on target.

This is one archery tip that I don’t know if anyone knows. One thing is for certain, this tip could help you become a better shot! For more of my archery tips and archery videos visit the bow blog, my YouTube channel, or archery fit section of bowlife.com.

Podcast with Levi Morgan | Becoming a Better Archer and Deer Hunter 

Archery and Bow Hunting Tips with Levi Morgan

Mark Kenyon of the Wired to Hunt Podcast recently invited me as a guest on his podcast. I had a great time talking about several topics related to becoming a better archer and deer hunter, as well as a variety of bow hunting and archery tips. Click below to listen to the podcast!

Here is what we covered in the podcast, check out the archery videos I have added for some of the topics:

  • My history and upbringing in tournament archery
  • My 2017 hunting season
  • My thoughts on transitioning from whitetail hunting to western and adventure hunting
  • My mountain goat hunt in British Columbia
  • The lessons I learned and biggest mistakes I made in the 2017 bow hunting season
  • My hunt for Boswell

Bow Hunting and Archery Tips

  • String jumpers and my experiences in 2017
  • My mental process of encountering mature bucks · Tips for archery target panic – VIDEO: Target Panic
  • My tips for archery practice
  • My tips for improving archery form
  • Taking detailed measurements for the perfect bow setup – Video: Bow Setup
  • My advice for achieving the proper arrow setup – Video: Arrow Spine
  • My favorite bow releases and broadheads – Video: Bow Releases

“Archery Fit” Ep.8 Bow Setup Notes | Bow Life TV

Levi’s Archery Tips for Bow Setups

On this episode of “Archery Fit” fueled by MTN Ops, I quickly run through some archery tips regarding bow setups. All of us at one point or another had that absolutely perfect bow setup. The setup was forgiving, accurate, and comfortable more than any bow you have ever shot. That bow setup could be described as that “dream setup”. Hopefully, today’s archery tip will help you mimic that exact setup regardless of the bow you shoot.  

Your bow will constantly be changing year to year. Whether you are switching models or installing new strings, each and every bow has its own personality. However, we can take any model bow, for example, a Matthews TRX, and set it up to get as close as possible to that dream setup by taking detailed measurements of our best setup. What I do and what I have learned to do the hard way is to simply write every detail down about the bow once I find the perfect setup.  


Here are some of the measurements you should write down:  

  • Draw weight 
  • Draw length 
  • Holding weight 
  • Axle-to-axle measurements 
  • How long the nocking loop is 
  • Bow rest positioning 
  • Brace height 
  • Distance from top axle to nocking point 
  • Distance from bottom axle to nocking point 
  • Stabilizer setup 
  • Arrow setup 

With these notes, you should be able to set your bow up close to or even to the exact feel as the perfect bow setup you had in the past! 

Find more archery tips, advice, and information here: https://www.bowlife.com/archery-tips-tricks-news/ 

Also check out the Bow Life Apparel: http://shop.bowlife.com/ 

How to Accurately Shoot Extreme Archery Angles

Archery Tips | How to Shoot Extreme Angles

Archers spend hours of practice working on shot technique and form. Days, weeks, and months are spent striving to develop repeated accuracy. While in practice this can be achieved, real-world scenarios can cause archers to throw form out the window. One such scenario is when an archer is forced to shoot an extreme angle. Whether it’s in a tournament or while bow hunting in the field, you need to know how to approach shooting these tough angles correctly. These archery tips should tell you how to do just that!

When you are shooting at an angle, the most important thing to remember is to keep your proper form. This is true for every different scenario. Tough tournament courses in rugged terrain can throw even the best archers off. Hunting scenarios such as an elevated whitetail stand, down a steep incline on a fall elk hunt, or uphill at sheep are uncontrollable shot opportunities that will happen. There is no way to avoid these tough shots, so the best thing for you to do is learn how to correctly keep your form and shoot these tough angles.

The correct process of shooting tough angles can be broken down into a two-step process.

Step 1: Starting with correct form

When shooting extreme angles the bow should be drawn back level using the same correct form that is used in practice. The bow is drawn level and the anchor point locked in.


Step 2: Bending at the waist

Once you have drawn level and have the correct anchor you need to acquire your target. This is where the problems normally start. Most archers will skip the first step, drawing uphill or downhill immediately without first achieving the proper form. This will usually shorten their draw which will affect the shot. To correctly acquire the target when shooting extreme angles, the shooter should bend at the waist after the draw is completed. The technique of bending at the waist after the bow is drawn and the shooter is locked in allows a target to be acquired either uphill or downhill without negatively affecting accuracy.


Many coveted hunts take place in the rugged country that requires shooting at steep angles. A shot opportunity at a bighorn or desert sheep, mule deer, mountain goat, and even a big bull elk are often not presented on level ground. Rugged terrain and country often present these shots. Using these archery tips when presented with this situation will ensure that you use correct form when conditions and terrain present an uphill or downhill shot.

Learning how to shoot up and downhill is a critical skill for any archer to have. By bending at the waist and holding the correct form after a level draw cycle, shooting on steep angles can be completed accurately. Following the archery tips in this blog will allow you to shoot with the correct form throughout the entire shot regardless of the angle.

Discover more archery tips here!


“Archery Fit” Ep.7 Arrow Spine | Bow Life TV

Archery Tips | Adjusting Arrow Spine

On this episode of “Archery Fit” fueled by MTN Ops, I quickly run through some archery tips regarding arrow spine. During this episode, I wanted to discuss how to change arrow spine and why you may not be getting the best results even when you have the correct spine.  

Let’s say you have a 300 spine arrow and you start adding weight to it. The more weight you add to the front or back of that arrow, the weaker that spine becomes. The spine also becomes weaker as the arrow gets longer. Essentially, you can tune a bow just by focusing on the arrow.  

For example, if you are paper tuning your bow and experience a high tear (the arrow is weak), that is telling you to either shorten the arrow or reduce the weight of the point on the front of the arrow. On the other hand, if you get a low tear (the arrow is stiff) you can either shoot longer arrows or add weight to the point.  

Your arrow’s fletching, nock, and point are all areas where you can adjust the arrow spine to be either weaker or stiffer. Your arrow is not just a 300 spine arrow, everything you do effects that arrow’s performance, your accuracy, and what your shot forgiveness will be.  

Find more archery tips, advice, and information here: https://www.bowlife.com/archery-tips-tricks-news/ 

Also check out the Bow Life Apparel: http://shop.bowlife.com/