Posts

10 Shooting Details to Focus on Improving this Summer

Archery Tips | 10 Things To Work On This Summer

With warmer temperatures and longer days, summer is the ideal time to focus on some of the finer details of your archery shooting performance. Summer bow practice is common place for any bow hunter, but focusing on specific details could drastically improve your performance. From refining your thought process to improving your breathing, details lead to being a more consistent archer. For this archery tips blog, Samantha and I outline 10 shooting details you should focus on during your summer bow practice.
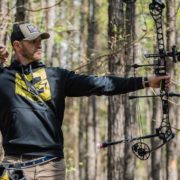
1. Shooting Stance

This is a great time to focus on your shooting stance. Any variations in your stance will cause variations in your shot. When you are in that high-pressure moment of shooting a deer, it’s crucial that your stance is instinctive, and the best way to do that is to consciously practice it this summer.

I recommend opening your stance up. Many archers close themselves off from the target, which forces them to turn their head into an uncomfortable position. Instead, keep your stance open enough allowing you to feel more comfortable.

I also recommend keeping your feet shoulder length apart and toes pointed slightly out. Keep in mind, the most important aspect is what feels most comfortable to you.

Once you find a comfortable stance, have someone trace your feet. Then, leave everything set up in its exact position and practice from this mark consistently. Before long, this will become a repeatable stance when practicing and on the stand.

You can read more details on my archery stance tips here.
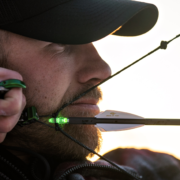
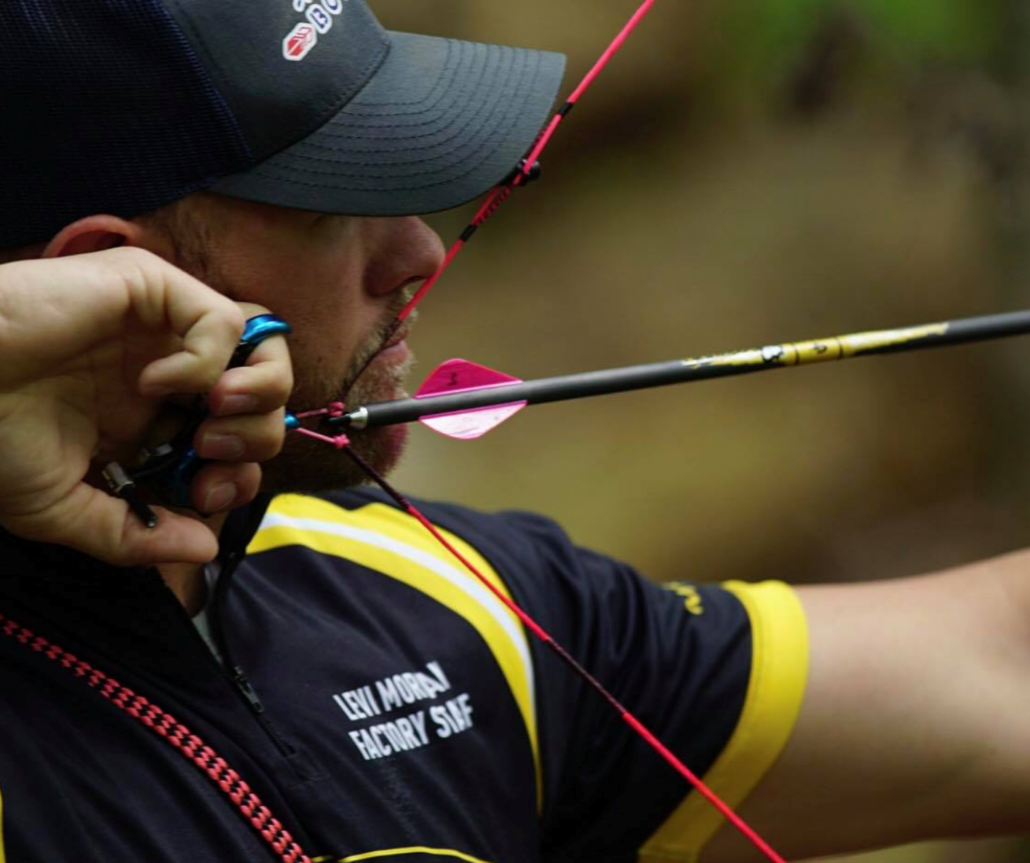
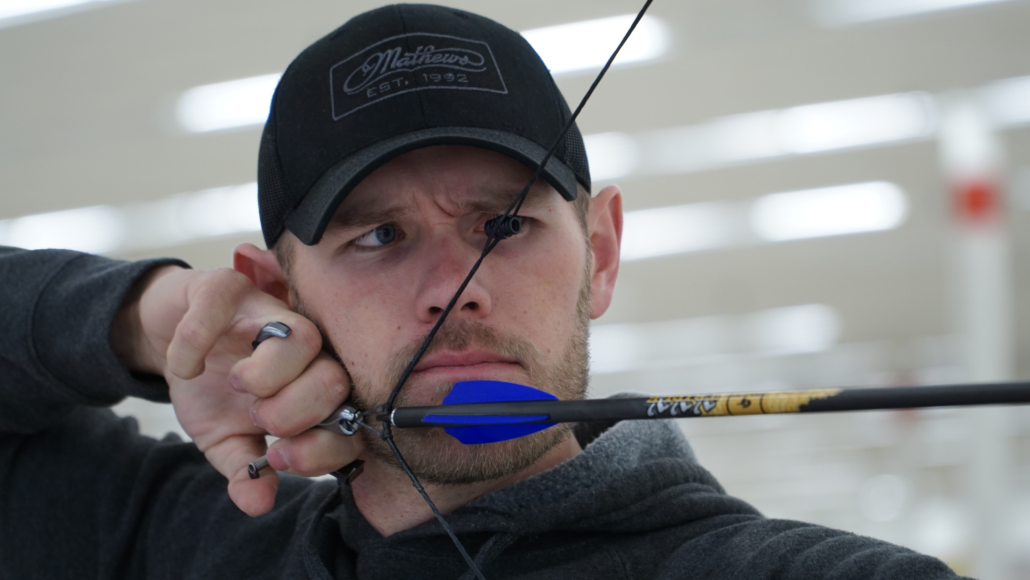
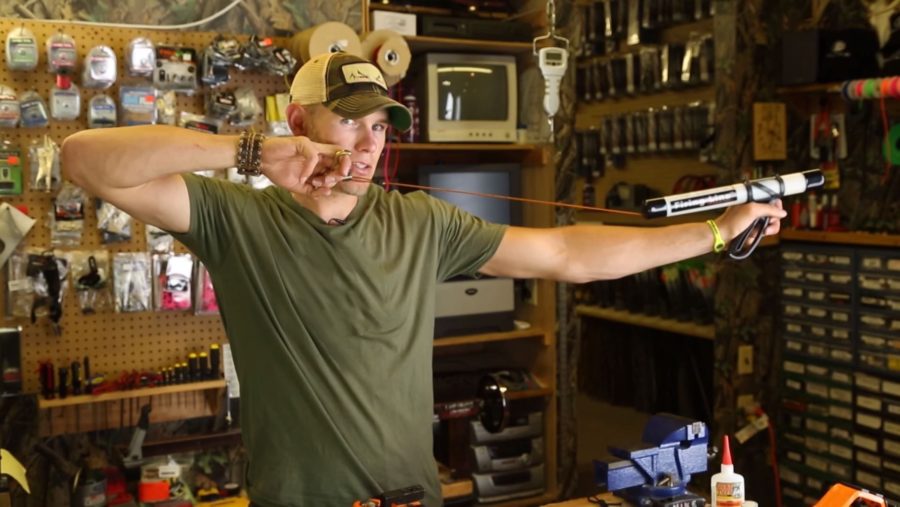
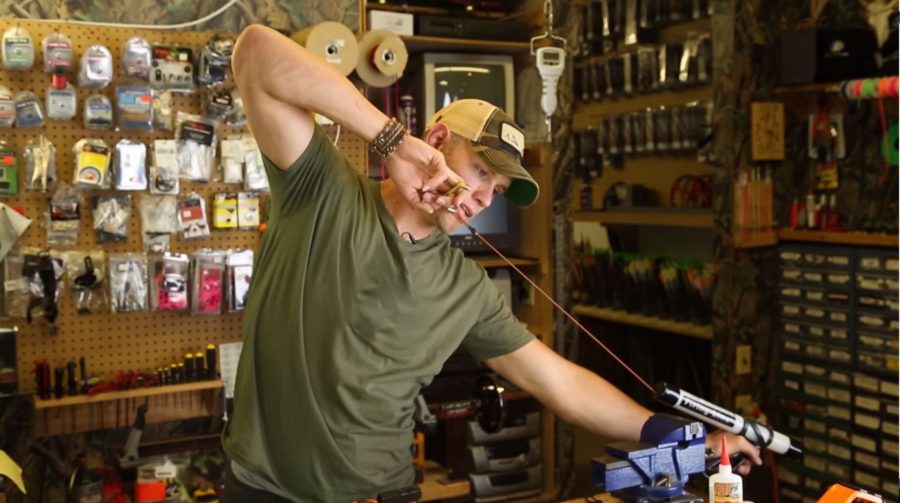
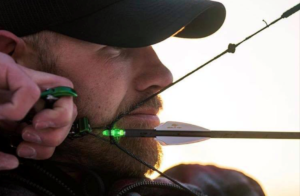
2. Bow Anchoring

Having a consistent anchor point is critical to success. However, despite what many archers think, making it consistent involves more than just one thing. That is why I follow a three-point process: release-to-hand, hand-to-face, and string-to-face. By keeping all three repeatable, I’m able to have a more consistent shot.

Release-to-hand means keeping the release in the same spot in the hand during every shot. To do this, find a place that feels comfortable to you than consciously practice it until it becomes the only place that feels right. Marking this spot on your hand may even be beneficial in the beginning.

After your release-to-hand position is set, find a comfortable hand-to-face position. I personally recommend lightly touching your hand to the same place on your face every time. For me, this position is placing my knuckles along the jaw line.

The third and final anchoring point to practice this summer is your string-to-face contact. I recommend lightly touching the string to your nose. This is one of the easiest places to anchor consistently, helping prevent slight movements that would otherwise be hard to trace along the face.

For a more in depth look at anchoring, you can read my three point anchor article here.

3. Back Tension Form

Summer is a perfect time to refine how you draw your bow. When it comes to this form, sometimes small changes can make significant differences. One of these changes may be how powerful your draw is. For example, one of the issues I’ve had with my draw in the past has been my use of the traditional “back tension” method. Although this was once necessary, with the modern technology found on bows, I’ve found that a powerful back tension draw is no longer relevant. In fact, too much of this “push and pull” can be the cause of inconsistencies.

Why is this? Because modern bows now have greater let off. This means that too much “push and pull” allows for too much force with nowhere to go.

For example, once you hit the “back wall”, your energy needs to be transferred somewhere else. This energy is often then transferred to your release arm, causing disparities in your shot consistency. That’s why if shot consistency is an issue for you, now is the time to try something different.

With the let off technology of newer bows, a less aggressive approach can be beneficial. Instead of using the traditional back tension method, try to relax during the motion instead. Use just enough muscle to get the string back to the stop. Then, let the bow do the rest.

This motion will requiring using less muscles, resulting in less fatigue. Remember, the more consistent you can be, the more accurate you will be.

Check out my full blog on back tension form here.
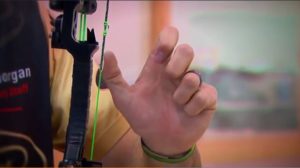
4. Grip

Torque is another cause of shot inconsistencies, and is something that should be improved upon this summer. To keep torque limited, I recommend gripping with only one muscle. This is achieved by sticking your thumb at the twelve o’clock position, then turn it to the two o’clock position while keeping the rest of your fingers tucked behind the grip. That way you are taking away the “life-line” of your hand. This reduces the chance of “over-gripping”, which is the cause of the torque.

It’s also critical to keep your grip “relaxed”. That’s why I recommend spending this summer consciously practicing a loose and minimal grip. That way it’s a subconscious response this fall.

Watch my video on the importance of your archery grip and torque here.

5. Mental Focus

Usual summer bow practice is the perfect time to prepare for stressful situations. Instead of calmly shooting in your backyard, try to ramp up the stress. These are the situations that cause your adrenaline to pump and make your knees weak. However, you might be wondering “how do you prepare for these stressful situations that you can’t replicate?” The answer is to subconsciously prepare for them.

To do this, it’s important to spend your time focusing on one small spot. By training yourself to do this, you’ll teach yourself to be more consistent no matter how hard your adrenaline is pumping. By learning how to focus on only a small spot this summer, you can learn how to subconsciously focus on only one small spot this fall. Being able to do this under stressful conditions will be critical to your success.

Read my advice on preparing your body, equipment, and especially your mind here.

6. Breathing

Something as simple as practicing your breath can help you execute a great shot when you need it the most. That’s why this summer is the perfect time to practice when to breathe. Learning when to breathe, and doing it repetitively, will be the key to keeping your composure come fall.

It is important to breath at the right moments. There are key times when I recommend breathing. First, I recommend breathing during the draw. Then, I make sure to take a final breath as the pin settles in, and hold that air in my lungs as I release the shot. It’s important to keep in mind that breathing too early will cause panic, while breathing at improper times will cause the pin to bounce. That’s why practicing breathing this summer will help you execute it subconsciously when you need it the most this fall.

Read my blog on breathing while shooting here.
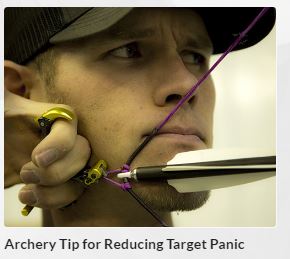
7. Target Panic

This summer is a great time to combat target panic. Many archers will come down to the target and when they reach the middle, they will immediately fire the shot.

To improve this, I recommend taking two weeks this summer to practice aiming without ever firing a shot. In fact, I don’t even recommend that you put your finger on the trigger.

Instead, simply pull back, aim, and hold. When the shot starts deteriorating, let up and regroup. Do this fifty to sixty times a day for the next two weeks. Before you know it, that pin will sit there longer than before. This helps you keep your composure in the field, and reminds you that seeing your target doesn’t mean it’s the perfect time for a shot.

Here is a blog and video with a solution to beat target panic.

8. Thought Process

Just like everything else in this guide, having a consistent thought process is crucial for execution, especially when faced with buck fever. Although it’s always important to practice this process, summer is a perfect time to make this process better.

Everyone’s process is different. However, my thought process consists of a mental checklist. Here I focus on a single step of the process rather than the big situation. This means focusing on ranging and aiming, rather than releasing. By practicing the steps in this guide, the release ends up being a subconscious movement, and I won’t succumb to the pressure of buck fever.

9. Shot Timing

Accuracy is all about repeatability. Shot timing is no different. This means trying to keep the same amount of time between the anchor and the release. For me, this is a three to four second window from the time I “anchor” to when the release fires. Staying consistent with this time is crucial to keeping groups as consistent as possible.

Here is a video on my tips for archery shot timing.

10. Focus on Scenarios

After you’ve been consistently improving your shooting technique, I recommend spending some of your summer bow practice sessions focusing on each possible scenario you may be faced with. This means if you might be shooting sitting down, then practice from a seated position. If you are a spot and stalk hunter, then practice shooting from kneeling position. Consider practicing from different angles, different stands, and especially different distances. Utilize the consistencies you’ve built from focusing on the tips listed above, and put them to use in real world situations.

The Ultimate Goal

All of these points and archery tips have one goal: to help you become more consistent. As I’ve mentioned before, repetition is everything in archery and summer is the perfect time to make the smallest details consistent. Putting conscious effort into these details and practicing them consistently, will allow you to repeat them instinctively. This will assure you are going to perform at your best when you are faced with that buck of your dreams this fall.

How to Properly Anchor Your Bow: The 3 Point Process

Archery Tips | A Consistent Anchor Point

Whether it’s for competition or for hunting, a consistent anchor point is a crucial component to shooting your best. Accurate shooting is repetitive shooting, and to be repetitive, you need to have an archery form that you can repeat subconsciouslyThis means knowing how to properly anchor your bow. There are three main components when developing a consistent anchor point: release-to-hand contact, hand-to-face contact, and string-to-face contact.  All of three of these points are crucial in assuring repeatability in your form and becoming the best archer or bow hunter you can be.

Release-to-Hand

The first point to focus on is where the release sits within the hand. Altering this position can affect form, draw length, and subsequently, accuracy. That’s why finding and practicing with the release in only one position of the hand is crucial in your success as an archer.

There are two aspects to consider when finding the correct release-to-hand contact position.  These are comfort and consistency.  It is essential that your release of choice fits comfortably within your hand. Secondly, this comfortable position needs to be repeatable.  That’s why I recommend marking that comfortable spot, either with a marker or a piece of tape.  This will help you to assure that you place your release there every time, until it’s the only place comfortable place to do so.


PhotoThe first point to focus on when developing a consistent anchor point is where the release sits within the hand. Altering this position can affect form, draw length, and subsequently, accuracy.

Hand-to-Face

Once you have the release in a comfortable position in your hand, you need to find a consistent position to mount your hand to your face. When doing this, it’s important to make actual contact without pushing too hard.  No contact makes it nearly impossible to be repetitive, while pushing too hard makes it difficult to execute the shot.

I personally use my first and middle knuckle and lightly anchor it against my jaw bone, avoiding excess pressure. This is both comfortable and easily repetitive.


Photo: When it comes to hand-to-face contact, I personally use my first and middle knuckle and lightly anchor it against my jaw bone, avoiding excess pressure. This is both comfortable and easy to repeat.

String-to-Face

The third anchor position is “string-to-face”.  This is the position where the string makes contact with the face, which for most people, is the nose.  It’s common to touch the string either to the tip of the nose or to the side of the nose, and although there isn’t a right or wrong, I find one to be more consistent than the other.

Many archers will choose to anchor on the side of their nose, which is fine as long as they can keep it consistent. However, I find it difficult to make contact on the same spot every time. That’s why I personally use the tip of my nose.   

How much pressure you apply to your nose is important as well. Many hunters find themselves putting too much, or too little, pressure against their nose as well. That’s why I recommend very lightly touching the tip of the nose.  This leaves less room for error, and therefore improving shot consistency.

Consistency Matters

To be accurate is to be consistent. This means there isn’t a “right” or a “wrong” shooting form, but rather a form that is repeatable. To be repeatable, your gear needs to fit you correctly and your anchor position needs to become a habit. That’s why I recommend practicing consistent release-to-hand, hand-to-face, and string-to-face anchor points. The combination of these three components helps assure consistency in your overall form and therefore improve your performance as a hunter.

Podcast with Levi Morgan | Becoming a Better Archer and Deer Hunter 

Archery and Bow Hunting Tips with Levi Morgan

Mark Kenyon of the Wired to Hunt Podcast recently invited me as a guest on his podcast. I had a great time talking about several topics related to becoming a better archer and deer hunter, as well as a variety of bow hunting and archery tips. Click below to listen to the podcast!

Here is what we covered in the podcast, check out the archery videos I have added for some of the topics:

  • My history and upbringing in tournament archery
  • My 2017 hunting season
  • My thoughts on transitioning from whitetail hunting to western and adventure hunting
  • My mountain goat hunt in British Columbia
  • The lessons I learned and biggest mistakes I made in the 2017 bow hunting season
  • My hunt for Boswell

Bow Hunting and Archery Tips

  • String jumpers and my experiences in 2017
  • My mental process of encountering mature bucks · Tips for archery target panic – VIDEO: Target Panic
  • My tips for archery practice
  • My tips for improving archery form
  • Taking detailed measurements for the perfect bow setup – Video: Bow Setup
  • My advice for achieving the proper arrow setup – Video: Arrow Spine
  • My favorite bow releases and broadheads – Video: Bow Releases

“Archery Fit” Ep.8 Bow Setup Notes | Bow Life TV

Levi’s Archery Tips for Bow Setups

On this episode of “Archery Fit” fueled by MTN Ops, I quickly run through some archery tips regarding bow setups. All of us at one point or another had that absolutely perfect bow setup. The setup was forgiving, accurate, and comfortable more than any bow you have ever shot. That bow setup could be described as that “dream setup”. Hopefully, today’s archery tip will help you mimic that exact setup regardless of the bow you shoot.  

Your bow will constantly be changing year to year. Whether you are switching models or installing new strings, each and every bow has its own personality. However, we can take any model bow, for example, a Matthews TRX, and set it up to get as close as possible to that dream setup by taking detailed measurements of our best setup. What I do and what I have learned to do the hard way is to simply write every detail down about the bow once I find the perfect setup.  


Here are some of the measurements you should write down:  

  • Draw weight 
  • Draw length 
  • Holding weight 
  • Axle-to-axle measurements 
  • How long the nocking loop is 
  • Bow rest positioning 
  • Brace height 
  • Distance from top axle to nocking point 
  • Distance from bottom axle to nocking point 
  • Stabilizer setup 
  • Arrow setup 

With these notes, you should be able to set your bow up close to or even to the exact feel as the perfect bow setup you had in the past! 

Find more archery tips, advice, and information here: https://www.bowlife.com/archery-tips-tricks-news/ 

Also check out the Bow Life Apparel: http://shop.bowlife.com/ 

How to Accurately Shoot Extreme Archery Angles

Archery Tips | How to Shoot Extreme Angles

Archers spend hours of practice working on shot technique and form. Days, weeks, and months are spent striving to develop repeated accuracy. While in practice this can be achieved, real-world scenarios can cause archers to throw form out the window. One such scenario is when an archer is forced to shoot an extreme angle. Whether it’s in a tournament or while bow hunting in the field, you need to know how to approach shooting these tough angles correctly. These archery tips should tell you how to do just that!

When you are shooting at an angle, the most important thing to remember is to keep your proper form. This is true for every different scenario. Tough tournament courses in rugged terrain can throw even the best archers off. Hunting scenarios such as an elevated whitetail stand, down a steep incline on a fall elk hunt, or uphill at sheep are uncontrollable shot opportunities that will happen. There is no way to avoid these tough shots, so the best thing for you to do is learn how to correctly keep your form and shoot these tough angles.

The correct process of shooting tough angles can be broken down into a two-step process.

Step 1: Starting with correct form

When shooting extreme angles the bow should be drawn back level using the same correct form that is used in practice. The bow is drawn level and the anchor point locked in.


Step 2: Bending at the waist

Once you have drawn level and have the correct anchor you need to acquire your target. This is where the problems normally start. Most archers will skip the first step, drawing uphill or downhill immediately without first achieving the proper form. This will usually shorten their draw which will affect the shot. To correctly acquire the target when shooting extreme angles, the shooter should bend at the waist after the draw is completed. The technique of bending at the waist after the bow is drawn and the shooter is locked in allows a target to be acquired either uphill or downhill without negatively affecting accuracy.


Many coveted hunts take place in the rugged country that requires shooting at steep angles. A shot opportunity at a bighorn or desert sheep, mule deer, mountain goat, and even a big bull elk are often not presented on level ground. Rugged terrain and country often present these shots. Using these archery tips when presented with this situation will ensure that you use correct form when conditions and terrain present an uphill or downhill shot.

Learning how to shoot up and downhill is a critical skill for any archer to have. By bending at the waist and holding the correct form after a level draw cycle, shooting on steep angles can be completed accurately. Following the archery tips in this blog will allow you to shoot with the correct form throughout the entire shot regardless of the angle.

Discover more archery tips here!


“Archery Fit” Ep.7 Arrow Spine | Bow Life TV

Archery Tips | Adjusting Arrow Spine

On this episode of “Archery Fit” fueled by MTN Ops, I quickly run through some archery tips regarding arrow spine. During this episode, I wanted to discuss how to change arrow spine and why you may not be getting the best results even when you have the correct spine.  

Let’s say you have a 300 spine arrow and you start adding weight to it. The more weight you add to the front or back of that arrow, the weaker that spine becomes. The spine also becomes weaker as the arrow gets longer. Essentially, you can tune a bow just by focusing on the arrow.  

For example, if you are paper tuning your bow and experience a high tear (the arrow is weak), that is telling you to either shorten the arrow or reduce the weight of the point on the front of the arrow. On the other hand, if you get a low tear (the arrow is stiff) you can either shoot longer arrows or add weight to the point.  

Your arrow’s fletching, nock, and point are all areas where you can adjust the arrow spine to be either weaker or stiffer. Your arrow is not just a 300 spine arrow, everything you do effects that arrow’s performance, your accuracy, and what your shot forgiveness will be.  

Find more archery tips, advice, and information here: https://www.bowlife.com/archery-tips-tricks-news/ 

Also check out the Bow Life Apparel: http://shop.bowlife.com/


“Archery Fit” Ep.5 Anchoring

Compound Bow Anchoring With Levi Morgan

Today on Archery Fit fueled by MTN Ops, I talk about compound bow anchoring. Your anchor point is one of the most important aspects of archery. To be repetitive is to be accurate. In the past, I have taught a 3 point anchor– how your hand touches the release, how the release touches the string, and how the string touches your face. This last point of contact can have the greatest impact on your shot.

I think the most accurate and repeatable action you can have when anchoring is touching the tip of your nose to the string. A lot of archers happen to touch the side of their nose to the string and that is fine as long as it is repeated. The one thing you need to watch however is pressing your face against the string. This pressure can cause the string to move which can turn paper tuning into a nightmare!

Focus on your compound bow anchoring when shooting your bow, but pay special attention to how much pressure you’re putting on the string. To quickly find out if you are doing this, take your face off the string completely when paper tuning. If you’re having bad tears when paper tuning with your face on the string then you’re applying pressure.

Get more archery tips, advice, and information here: https://www.bowlife.com/archery-tips-tricks-news/

“Archery Fit” Ep.4 Bow Sight Length | Bow Life TV

Bow Sight Length with Levi Morgan

On today’s segment of Archery Fit, brought to you by MTN OPS, I talk about bow sight length! I see a lot of guys…famous guys that run their sight bar about 3ft from their riser (over exaggeration). When you are hunting with a gun, obviously the longer the barrel the more accurate the shot. This is simply not the case for bow sight length.  

One of the hardest things to control for archers is bow torque. The further your bow sight is from the riser and your hand, the more the pins or your point of impact moves with torque. The closer you can get that sight to the riser, the less it moves when you torque your bow. Remember this the next time you are shopping for a bow sight, or aim to adjust your sight based on a common misconception.


“Archery Fit” Ep.3 Shot Timing | Bow Life TV

Bow Shot Timing With Levi Morgan 

On today’s segment of Archery Fit brought to you by MTN OPS, I talk about shot timing!  Timing is very important in your shot sequence. Repetition in archery is what it is essentially all about. Consistency is critical.
I define shot timing as the time you come to full draw and anchor, to when that shot fires. If your shot timing is more than 4-5 seconds shot to shot, then there will be a good chance your grouping and consistency will suffer. If your goal is to become the best archer you can physically be, then dialing in and staying within your shot timing is the way to go.