Posts

The Archery Tip No One Knows | Tuning Arrows Before Fletching

The Archery Tip No One Knows

This is an archery tip that not many people know about. Sure everyone knows about why you should tune your arrows, and how to fletch an arrow, but rarely have I heard about tuning arrows before fletching is applied. This tip should help you become a better archer and bow hunter.

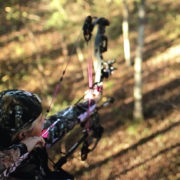
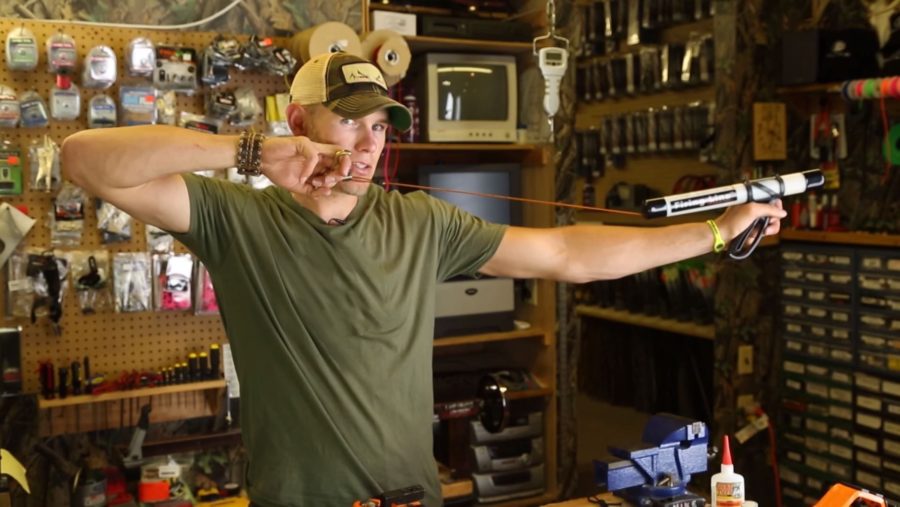
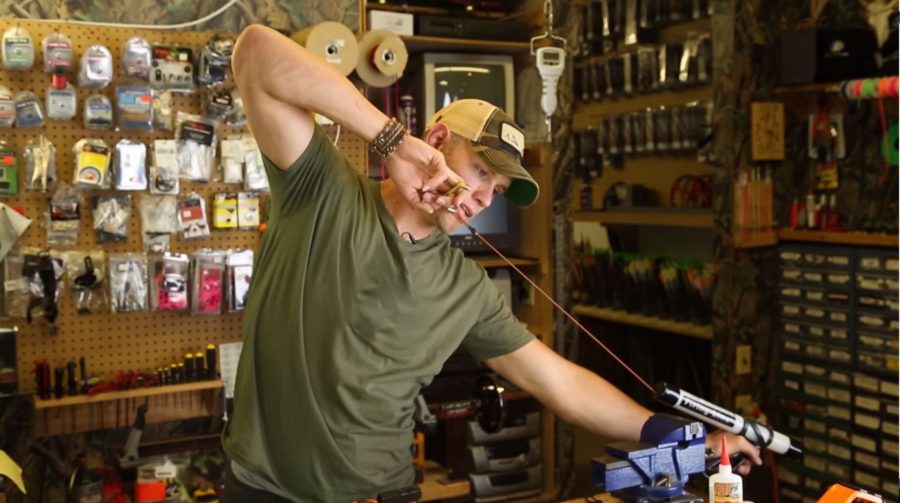
I start by bare shaft tuning my bow, then the next thing I do before I fletch my arrows is take that arrow and shoot it into the target. The idea here is that I can see the natural launch of the arrow out of the bow. If the arrow launches out of the bow left, then I will fletch it with a left helical. If the bow launches the arrow right, then I will fletch the arrow with a right helical. This fletches with the natural launch of the arrow, creating a lot more forgiving bow setup.

If you don’t do this, and fletch on the wrong side of the arrow, you will tend to get a knuckleball effect. Say you have an arrow with a natural left launch, but fletch it with a right helical. The arrow will immediately launch left, but will have to correct itself in flight to the right. In that process the arrow could have a lot more movement, throwing off its flight and destination on target.

This is one archery tip that I don’t know if anyone knows. One thing is for certain, this tip could help you become a better shot! For more of my archery tips and archery videos visit the bow blog, my YouTube channel, or archery fit section of bowlife.com.

Levi Morgan Robbed | All Bow Hunting Gear Stolen!

Bow Hunting Gear Stolen!

Vicksburg, Mississippi January 2nd, 2018…one of my worst nightmares came true. After killing a stud of an old Mississippi river 8 point, Justin Zuzak and I were headed to Louisiana for another hunt. We woke up to an awful sight, the truck had been ripped apart and all of our bow hunting gear was missing!

There isn’t much you can do when you find all of your gear missing. First, we filed a report with the police and spoke with the hotel. We watched some of the footage from the security camera and found out the culprit was a white male in a newer grey Chevy truck. When he first appeared on camera he drove through the camera’s view with an empty truck bed. However, when he reentered view the truck bed was full of gear and what appeared to be our Bronc Box. After noticing this, the police took over and went to the surrounding hotels checking their footage to try and get a better view or possibly even a plate number.

With all of our bow hunting gear stolen, we ended up having to cut our trip short and start the drive home. Below is a full list of what was stolen out of the truck.

  • Bronc Box
  • My new 2018 Matthew’s Triax bow
  • Arrows
  • Stabilizers
  • Zeiss binoculars
  • Zeiss spotting scope
  • Various bow tools and accessories
  • Safety harnesses and lifelines
  • A tree stand and a set of climbing sticks
  • Justin’s Muck Artic Pro Boots
  • 2 Heater Body Suits
  • Kessler camera slider

We will keep you updated with any new developments. Hopefully, the police can find the gear or find out more information to chase it down! I’ve always trusted people too much…lesson learned I guess!

Levi Morgan’s Mathews Triax Bow Review

Mathews Triax Bow Review

Today I want to talk to you about what has been so exciting for us lately, the all new Mathews Triax™ bow. In this Mathews Triax™ bow review I will tell you the reasons why I feel Mathews absolutely hit it out of the park with this bow!


I have used this bow for several hunts. It has been tested with mountain hunts, whitetail hunts, and spot and stalk hunts, and the size of this bow is perfect for every scenario.  Now this bow is 28 inches axle-to-axle, which many of you might think is a short bow for someone with a long draw length like me. However, I have this bow at its maximum draw length and this bow works for me! I have sacrificed zero accuracy, and this is due to several reasons. The first is the Crosscentric Cam system, a very successful cam system requiring less human effort but still has the same power and same speed as a more aggressive cam system. This bow also features the new and improved harmonic 3D damping technology. Naturally the bow wants to wiggle left and right on the shot.  With the new technology however, the bow is almost completely dead in the hand without the addition of any stabilizers.

In my opinion Mathews hit it out of the park with the all new Triax™ bow, and you need to give one a try.


How to Accurately Shoot Extreme Archery Angles

Archery Tips | How to Shoot Extreme Angles

Archers spend hours of practice working on shot technique and form. Days, weeks, and months are spent striving to develop repeated accuracy. While in practice this can be achieved, real-world scenarios can cause archers to throw form out the window. One such scenario is when an archer is forced to shoot an extreme angle. Whether it’s in a tournament or while bow hunting in the field, you need to know how to approach shooting these tough angles correctly. These archery tips should tell you how to do just that!

When you are shooting at an angle, the most important thing to remember is to keep your proper form. This is true for every different scenario. Tough tournament courses in rugged terrain can throw even the best archers off. Hunting scenarios such as an elevated whitetail stand, down a steep incline on a fall elk hunt, or uphill at sheep are uncontrollable shot opportunities that will happen. There is no way to avoid these tough shots, so the best thing for you to do is learn how to correctly keep your form and shoot these tough angles.

The correct process of shooting tough angles can be broken down into a two-step process.

Step 1: Starting with correct form

When shooting extreme angles the bow should be drawn back level using the same correct form that is used in practice. The bow is drawn level and the anchor point locked in.


Step 2: Bending at the waist

Once you have drawn level and have the correct anchor you need to acquire your target. This is where the problems normally start. Most archers will skip the first step, drawing uphill or downhill immediately without first achieving the proper form. This will usually shorten their draw which will affect the shot. To correctly acquire the target when shooting extreme angles, the shooter should bend at the waist after the draw is completed. The technique of bending at the waist after the bow is drawn and the shooter is locked in allows a target to be acquired either uphill or downhill without negatively affecting accuracy.


Many coveted hunts take place in the rugged country that requires shooting at steep angles. A shot opportunity at a bighorn or desert sheep, mule deer, mountain goat, and even a big bull elk are often not presented on level ground. Rugged terrain and country often present these shots. Using these archery tips when presented with this situation will ensure that you use correct form when conditions and terrain present an uphill or downhill shot.

Learning how to shoot up and downhill is a critical skill for any archer to have. By bending at the waist and holding the correct form after a level draw cycle, shooting on steep angles can be completed accurately. Following the archery tips in this blog will allow you to shoot with the correct form throughout the entire shot regardless of the angle.

Discover more archery tips here!


“Archery Fit” Ep.7 Arrow Spine | Bow Life TV

Archery Tips | Adjusting Arrow Spine

On this episode of “Archery Fit” fueled by MTN Ops, I quickly run through some archery tips regarding arrow spine. During this episode, I wanted to discuss how to change arrow spine and why you may not be getting the best results even when you have the correct spine.  

Let’s say you have a 300 spine arrow and you start adding weight to it. The more weight you add to the front or back of that arrow, the weaker that spine becomes. The spine also becomes weaker as the arrow gets longer. Essentially, you can tune a bow just by focusing on the arrow.  

For example, if you are paper tuning your bow and experience a high tear (the arrow is weak), that is telling you to either shorten the arrow or reduce the weight of the point on the front of the arrow. On the other hand, if you get a low tear (the arrow is stiff) you can either shoot longer arrows or add weight to the point.  

Your arrow’s fletching, nock, and point are all areas where you can adjust the arrow spine to be either weaker or stiffer. Your arrow is not just a 300 spine arrow, everything you do effects that arrow’s performance, your accuracy, and what your shot forgiveness will be.  

Find more archery tips, advice, and information here: https://www.bowlife.com/archery-tips-tricks-news/ 

Also check out the Bow Life Apparel: http://shop.bowlife.com/


“Archery Fit” Ep.3 Shot Timing | Bow Life TV

Bow Shot Timing With Levi Morgan 

On today’s segment of Archery Fit brought to you by MTN OPS, I talk about shot timing!  Timing is very important in your shot sequence. Repetition in archery is what it is essentially all about. Consistency is critical.
I define shot timing as the time you come to full draw and anchor, to when that shot fires. If your shot timing is more than 4-5 seconds shot to shot, then there will be a good chance your grouping and consistency will suffer. If your goal is to become the best archer you can physically be, then dialing in and staying within your shot timing is the way to go.